Archive - AZ-102: Microsoft Azure Administrator Certification Transition
Sample Questions
Question: 194
Measured Skill: Implement and manage storage (5-10%)
You plan to deploy 20 Azure virtual machines by using an Azure Resource Manager template. The virtual machines will run the latest version of Windows Server 2016 Datacenter by using an Azure Marketplace image.
You need to complete the storageProfile section of the template.
How should you complete the storageProfile section?
(To answer, select the appropriate options in the answer area. NOTE: Each correct selection is worth one point.)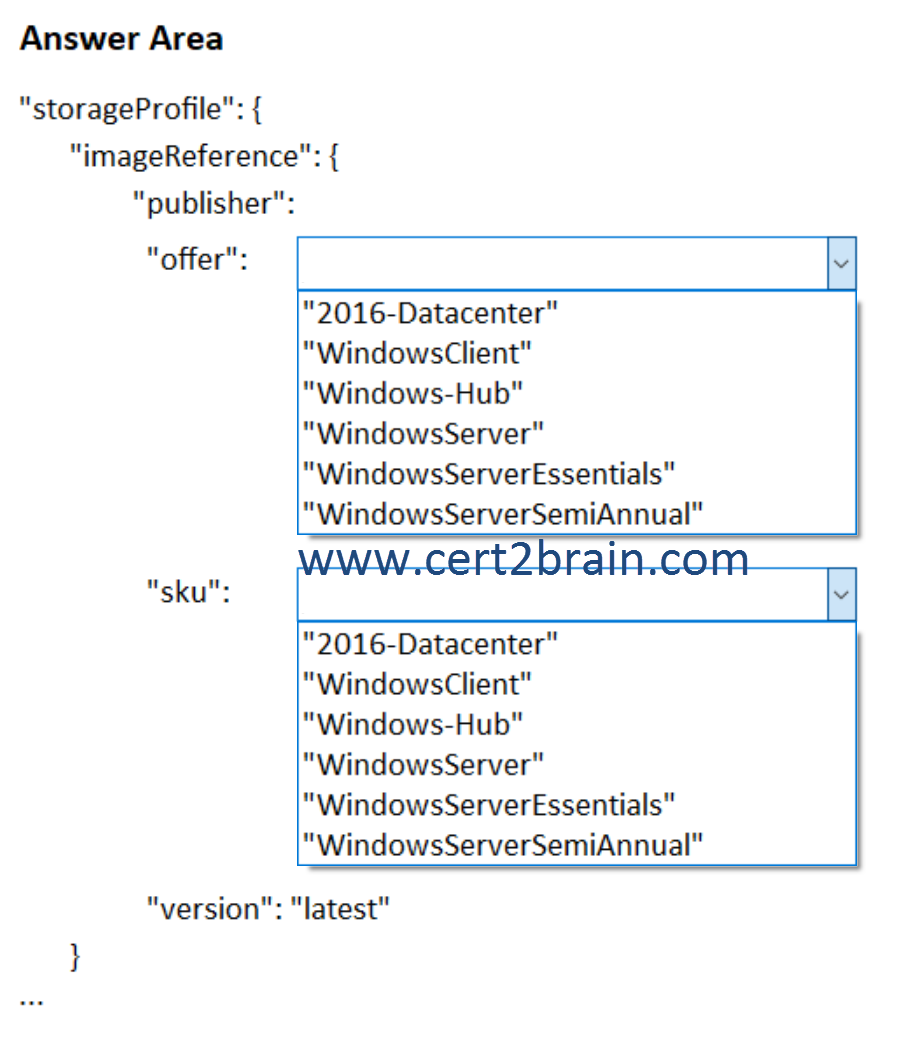
| A | P1: "2016-Datacenter"
P2: "WindowsServerEssentials" |
| B | P1: "WindowsClient"
P2: "WindowsServer" |
| C | P1: "Windows-Hub"
P2: "WindowsServerSemiAnnual" |
| D | P1: "WindowsServer"
P2: "2016-Datacenter" |
| E | P1: "WindowsServerEssentials"
P2: "WindowsServer" |
| F | P1: "WindowsServerSemiAnnual"
P2: "2016-Datacenter" |
Correct answer: DExplanation:
You can specify a Marketplace image when you create a VM programmatically with PowerShell, Resource Manager templates, or other tools.
A Marketplace image in Azure has the following attributes:
- Publisher: The organization that created the image. Examples: Canonical, MicrosoftWindowsServer
- Offer: The name of a group of related images created by a publisher. Examples: UbuntuServer, WindowsServer
- SKU: An instance of an offer, such as a major release of a distribution. Examples: 18.04-LTS, 2019-Datacenter
- Version: The version number of an image SKU.
To identify a Marketplace image when you deploy a VM programmatically, supply these values individually as parameters. Some tools accept an image URN, which combines these values, separated by the colon (:) character: Publisher:Offer:Sku:Version. In a URN, you can replace the version number with "latest", which selects the latest version of the image.
This table shows a subset of available Skus for the indicated Publishers and Offers.
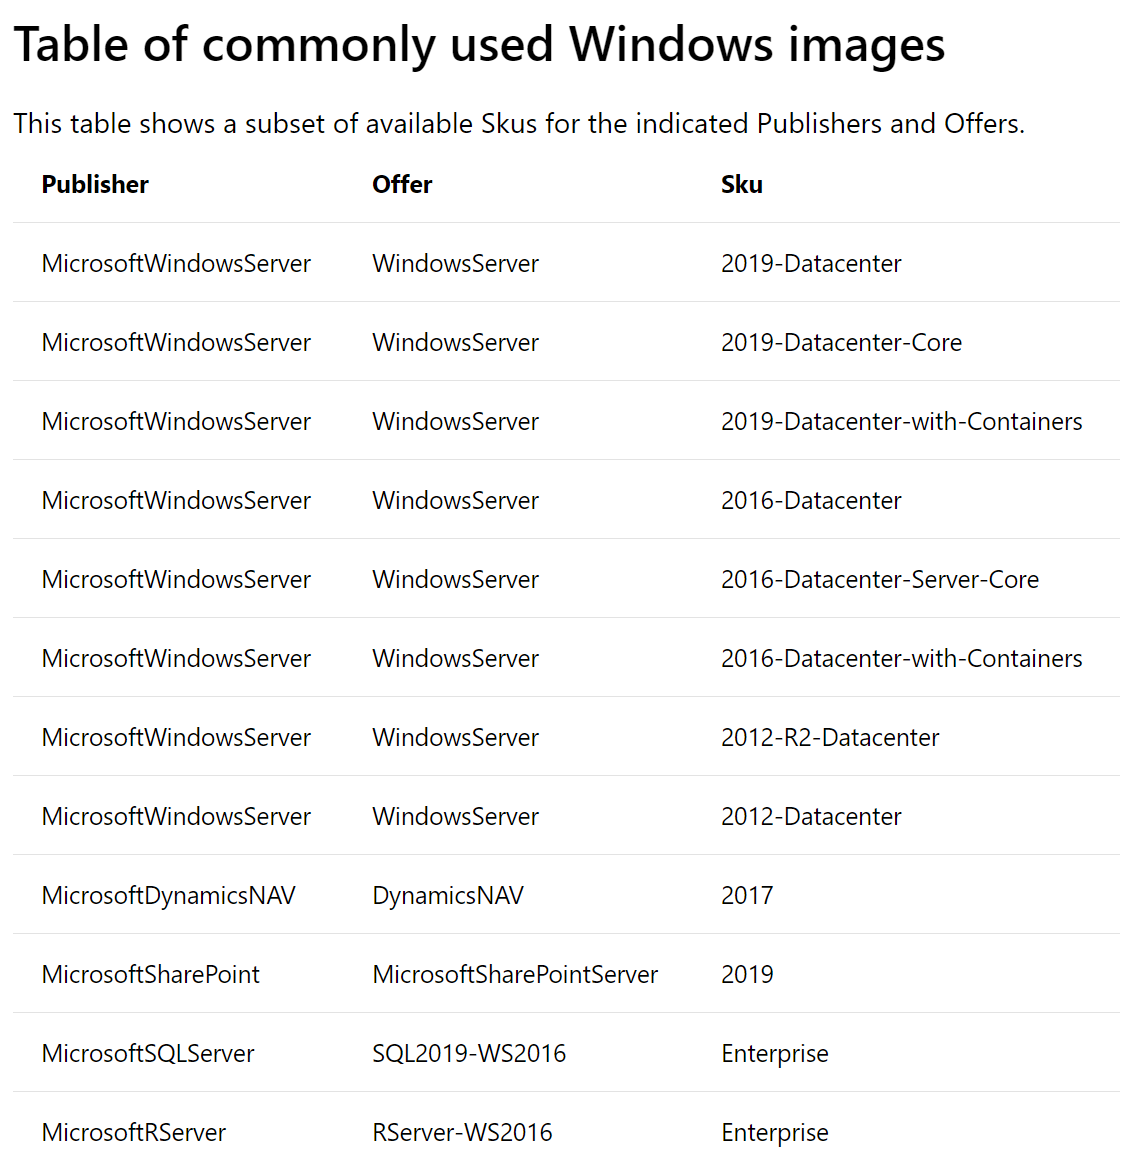
Reference: Find Windows VM images in the Azure Marketplace with Azure PowerShell
Question: 195
Measured Skill: Implement and manage storage (5-10%)
Note: This is a lab or performance-based testing (PBT) question. To answer, you will perform a set of tasks in a live environment. Some functionality (e.g. copy and paste) will not be possible by design. Scoring is based on the outcome of performing the tasks stated in the lab. It doesn't matter how you accomplish the goal.
You plan to prevent users from accidentally deleting blob data from Azure.
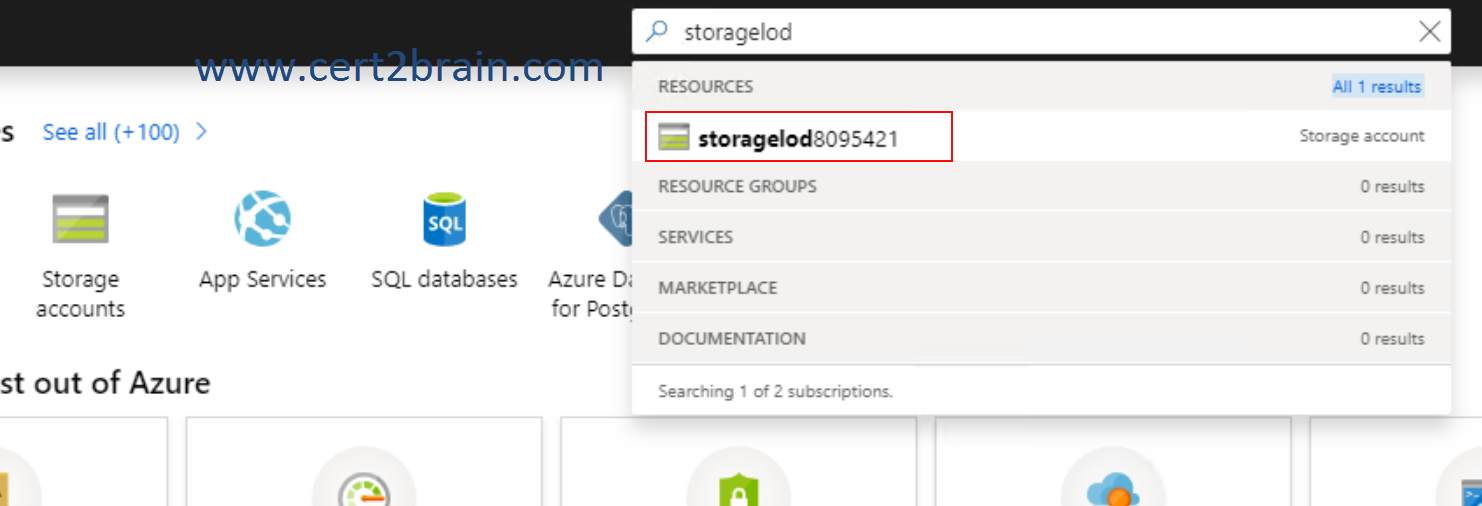
You need to ensure that administrators can recover any blob data that is deleted accidentally from the storagelod8095421 storage account for 14 days after the deletion occurred.
What should you do from the Azure portal?
(This question has to be solved in a lab environment. Click on Solution to see a valid example solution. Answer "True" if you can solve the problem, otherwise select "False".)Correct answer: ASolution:
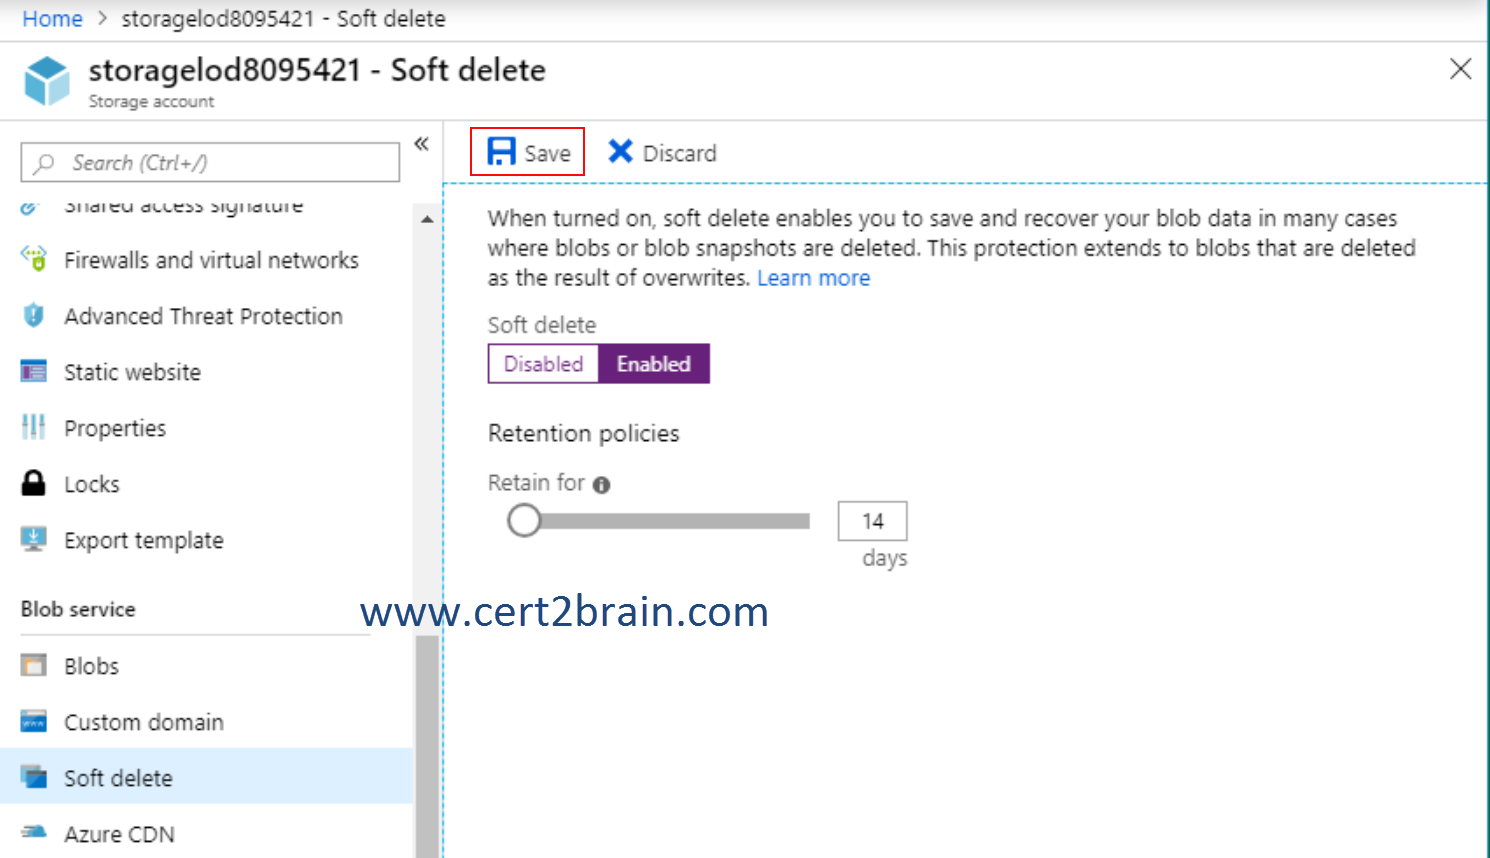
We need to enable "soft delete" for the storage account and set it to retain deleted and overwritten data in a 14-day period.
Step 01: Connect to Azure portal. Type https://portal.azure.com in the browser address bar and use the provided credentials for Sign in.
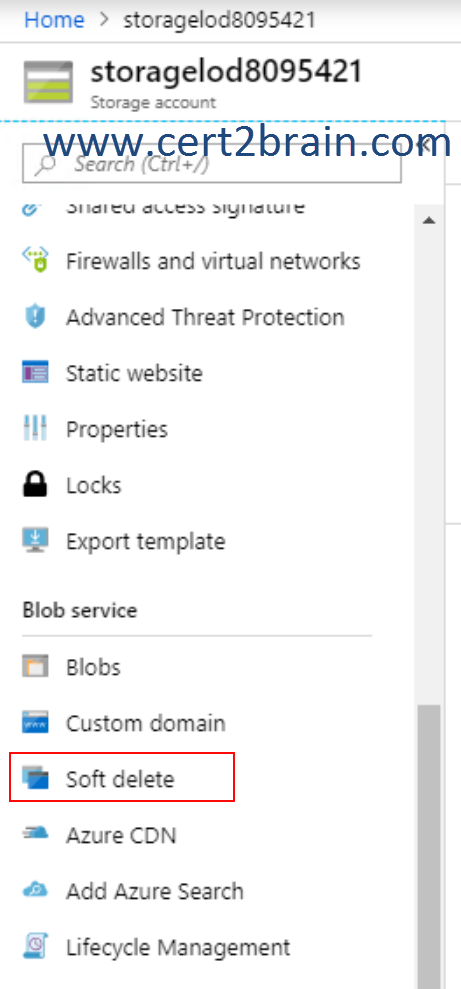
Step 02: Open the blade for the storage account by typing the name of the storage account in the Azure search bar.
Step 03: Click on Soft delete.
Step 04: Enable soft delete, set the retention policy to 14 days and don´t forget to click on Save.
Reference: Soft delete for Azure Storage blobs
Question: 196
Measured Skill: Implement and manage storage (5-10%)
Note: This is a lab or performance-based testing (PBT) question. To answer, you will perform a set of tasks in a live environment. Some functionality (e.g. copy and paste) will not be possible by design. Scoring is based on the outcome of performing the tasks stated in the lab. It doesn't matter how you accomplish the goal.
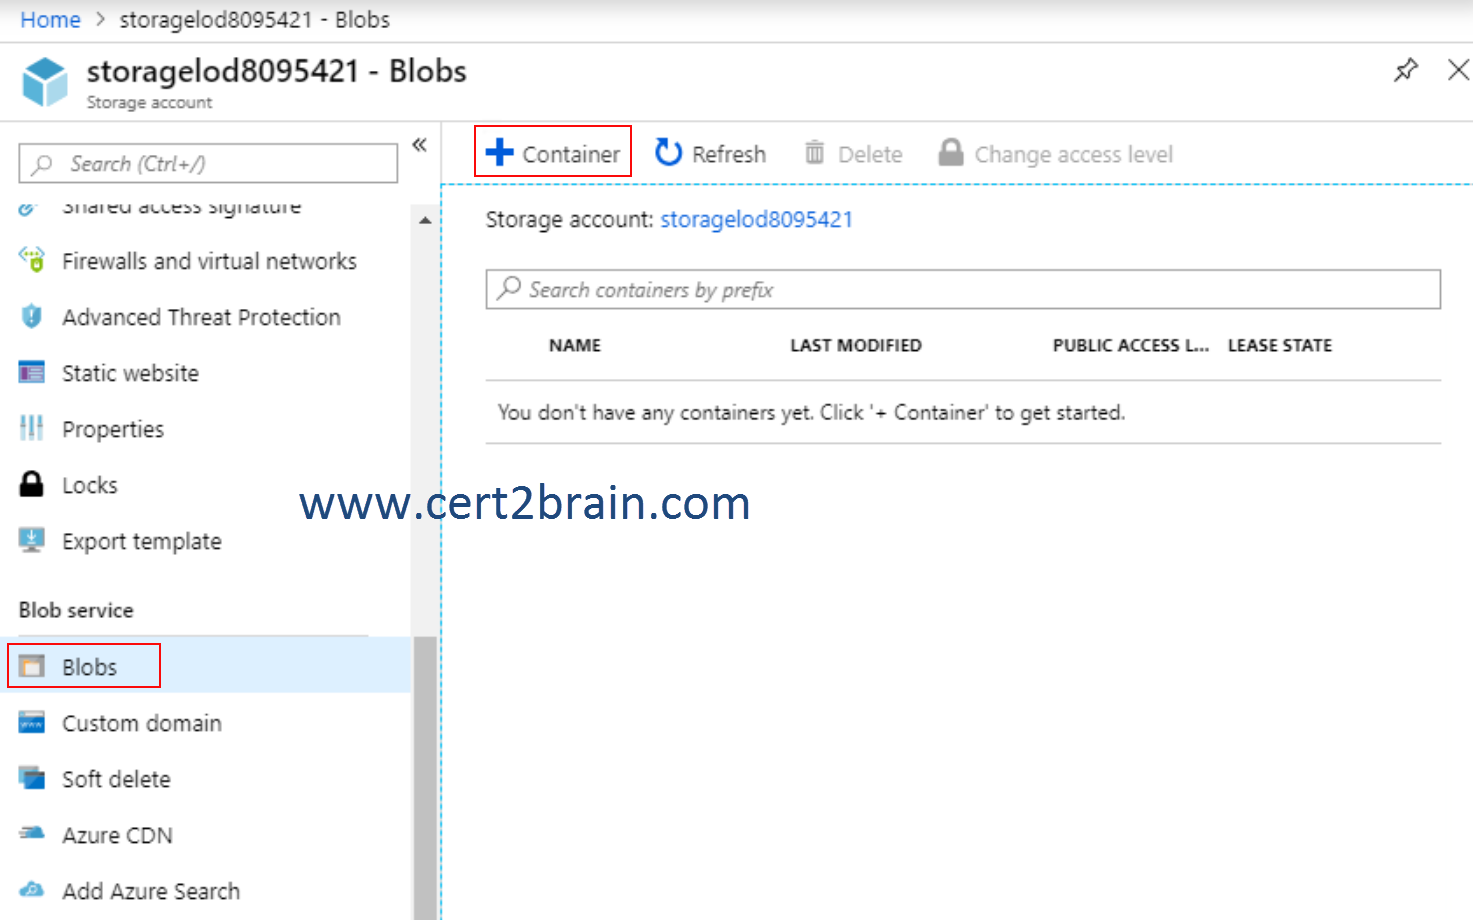
Your company plans to store several documents on a public website.
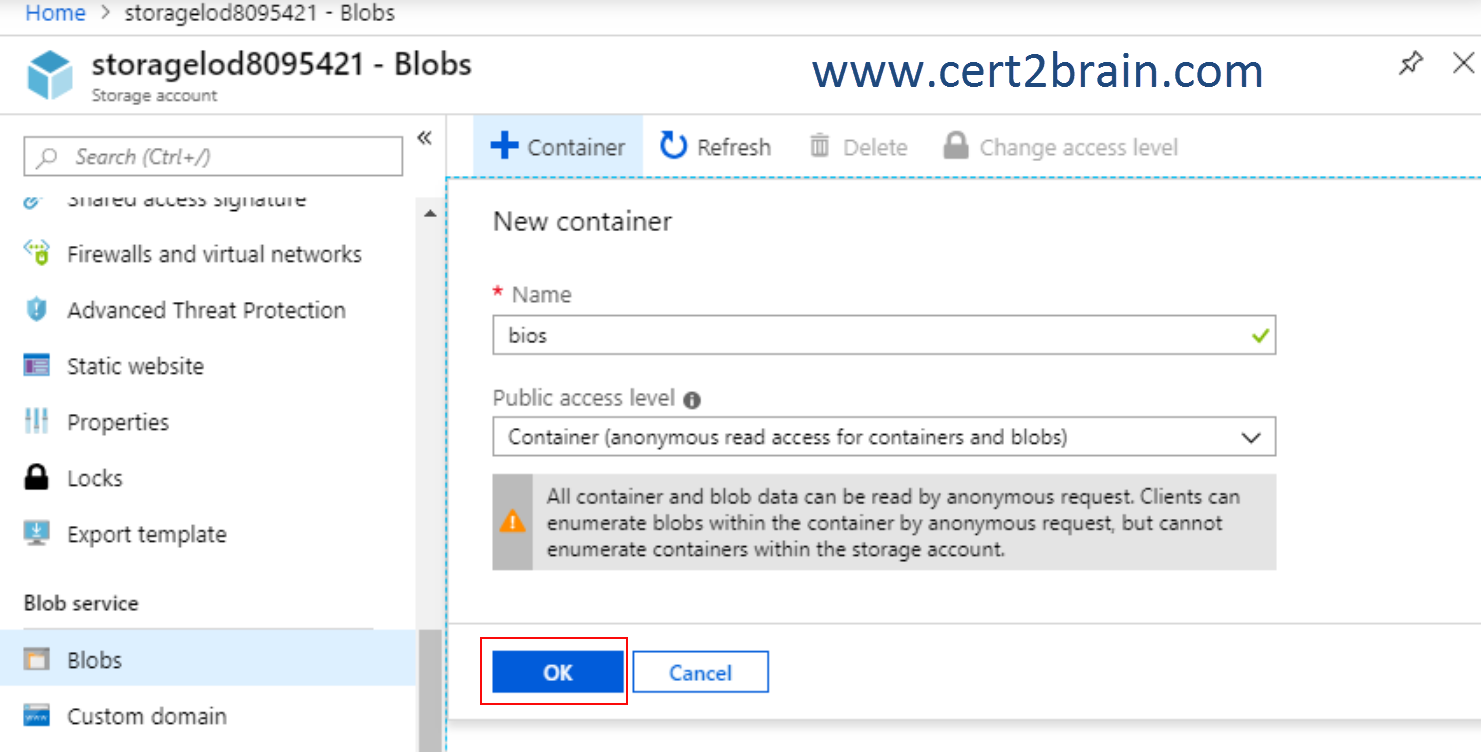
You need to create a container named bios that will host the documents in the storagelod8095421 storage account. The solution must ensure anonymous access and must ensure that users can browse folders in the container.
What should you do from the Azure portal?
(This question has to be solved in a lab environment. Click on Solution to see a valid example solution. Answer "True" if you can solve the problem, otherwise select "False".)Correct answer: ASolution:
Step 01: Connect to Azure portal. Type https://portal.azure.com in the browser address bar and use the provided credentials for Sign in.
Step 02: Open the management blade for the storage account by typing the name of the storage account in the Azure search bar.
Step 03: Open the Blobs page and click on +container to create a new container.
Step 04: Enter the name for the container as specified in the question. Set the public access level to Container (anonymous read access for containers and blobs), then click on OK.
Reference: Manage anonymous read access to containers and blobs
Question: 197
Measured Skill: Implement and manage storage (5-10%)
Note: This is a lab or performance-based testing (PBT) question. To answer, you will perform a set of tasks in a live environment. Some functionality (e.g. copy and paste) will not be possible by design. Scoring is based on the outcome of performing the tasks stated in the lab. It doesn't matter how you accomplish the goal.
Your company plans to host in Azure the source files of several line-of-business applications.
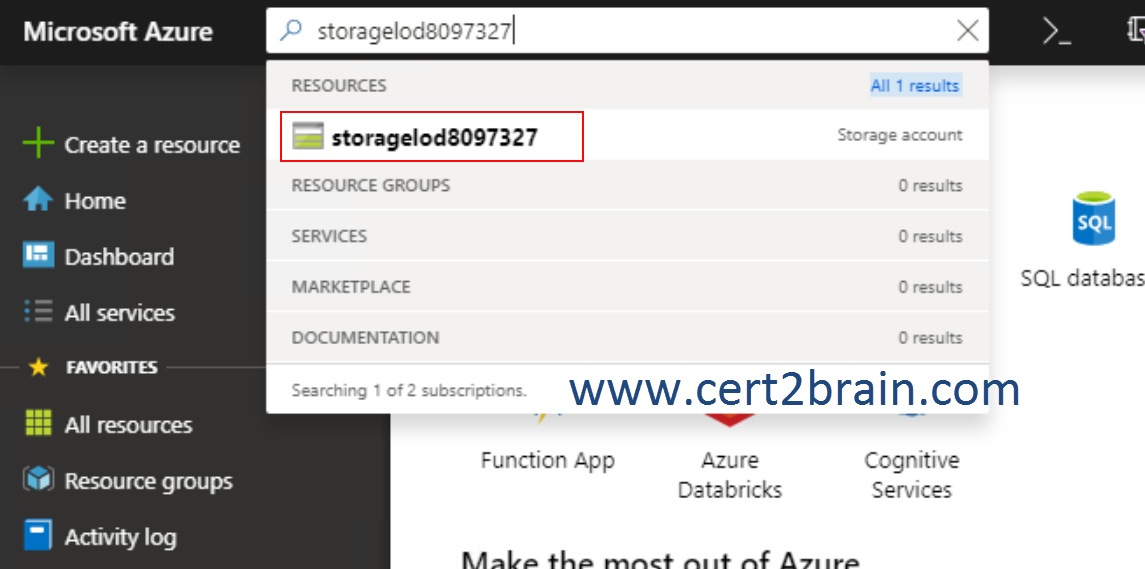
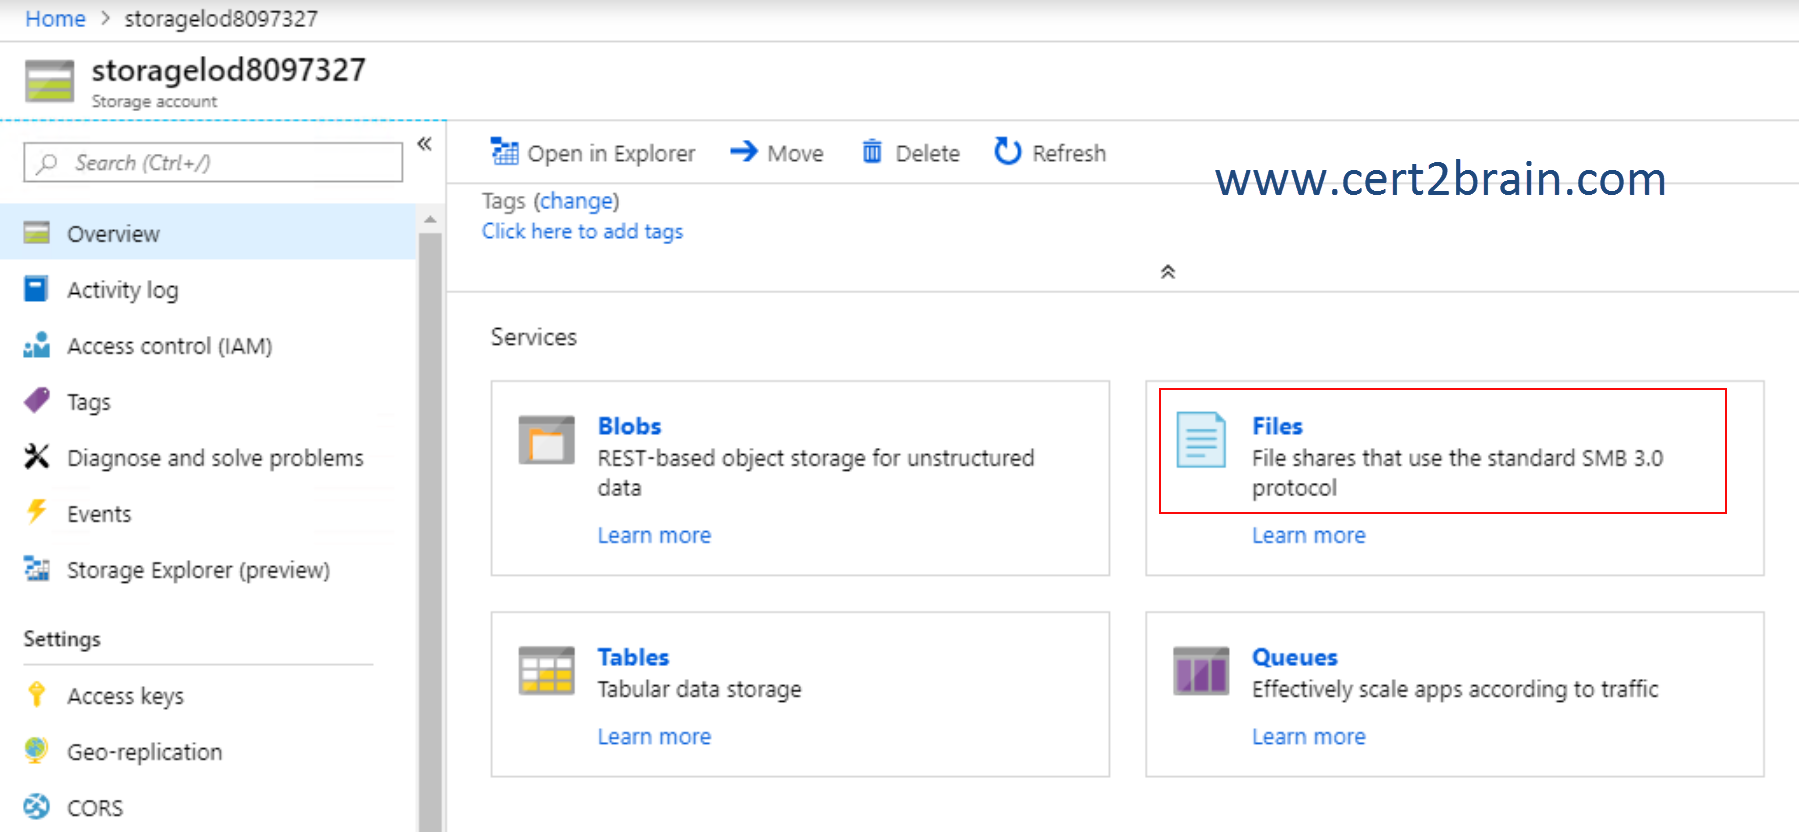
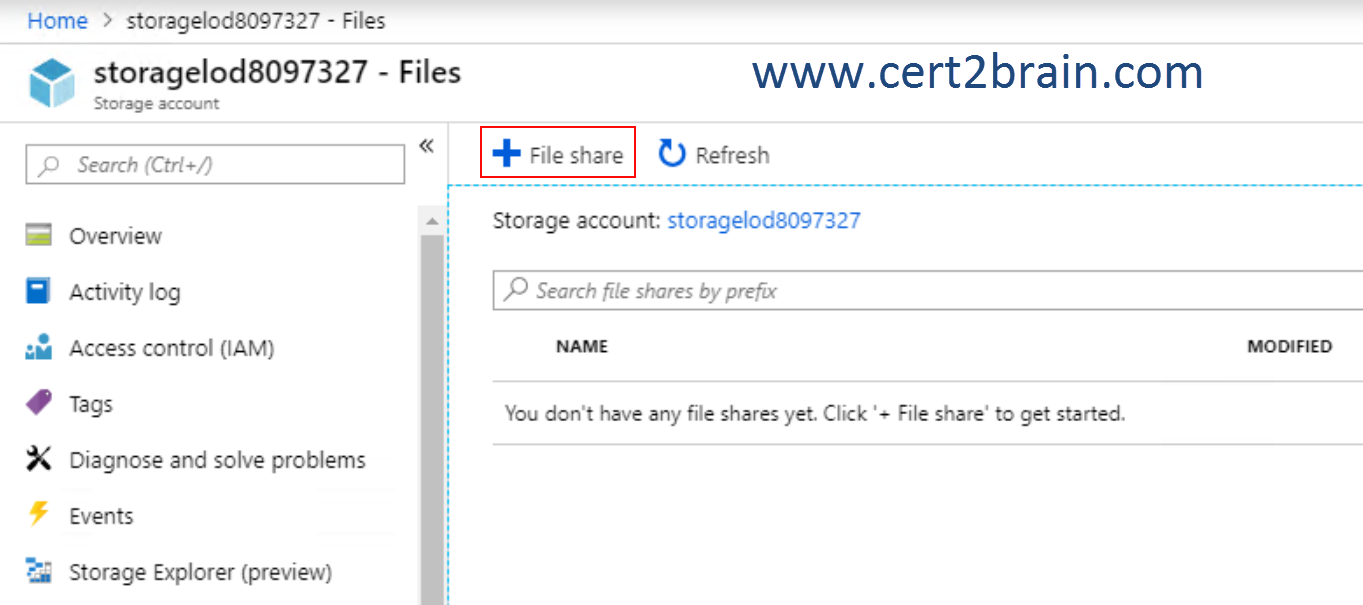
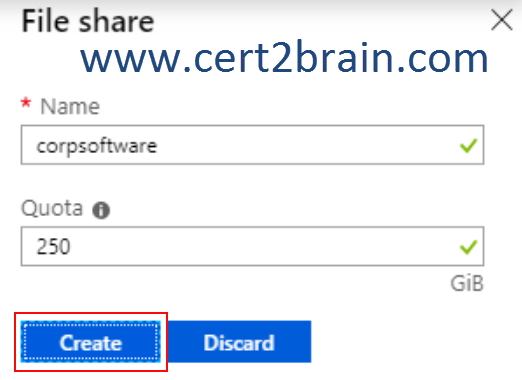
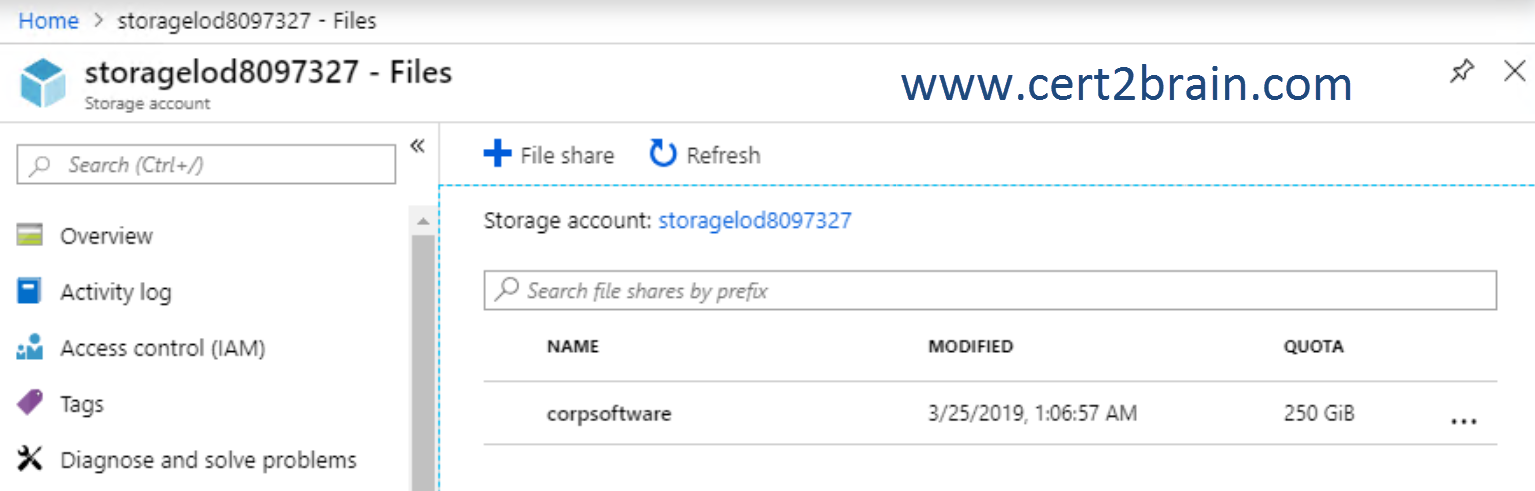
You need to create an Azure file share named corpsoftware in the storagelod8097327 storage
account. The solution must ensure the corpsoftware can store only up to 250 GB of data.
What should you do from the Azure portal?
(This question has to be solved in a lab environment. Click on Solution to see a valid example solution. Answer "True" if you can solve the problem, otherwise select "False".)Correct answer: ASolution:
We need to find and open the blade for the existing storage account and create an Azure file share with a storage quota.
Step 01: Connect to Azure portal. Type https://portal.azure.com in the browser address bar and use the provided credentials for Sign in.
Step 02: Open the management blade for the storage account by typing the name of the storage account in the Azure search bar.
Step 03: Click on Files to create a new Azure file share.
Step 04: Click on +File share.
Step 05: Enter the required name for the file share and set the quota to 250 GB. Then click on Create.
Reference: Create a file share in Azure Files
Question: 198
Measured Skill: Configure and manage virtual networks (15-20%)
Note: This is a lab or performance-based testing (PBT) question. To answer, you will perform a set of tasks in a live environment. Some functionality (e.g. copy and paste) will not be possible by design. Scoring is based on the outcome of performing the tasks stated in the lab. It doesn't matter how you accomplish the goal.
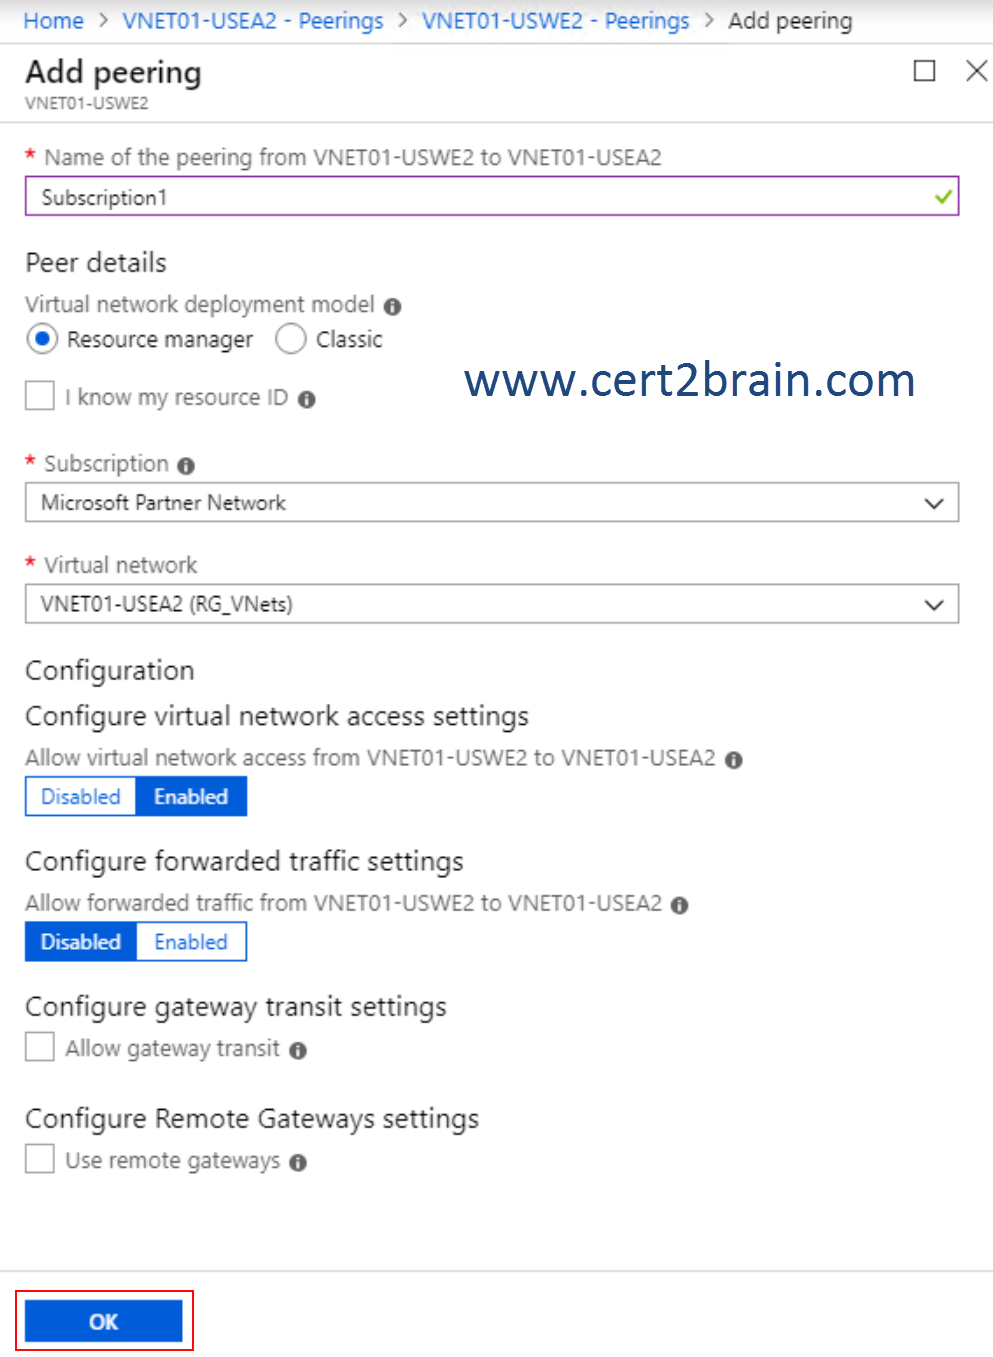
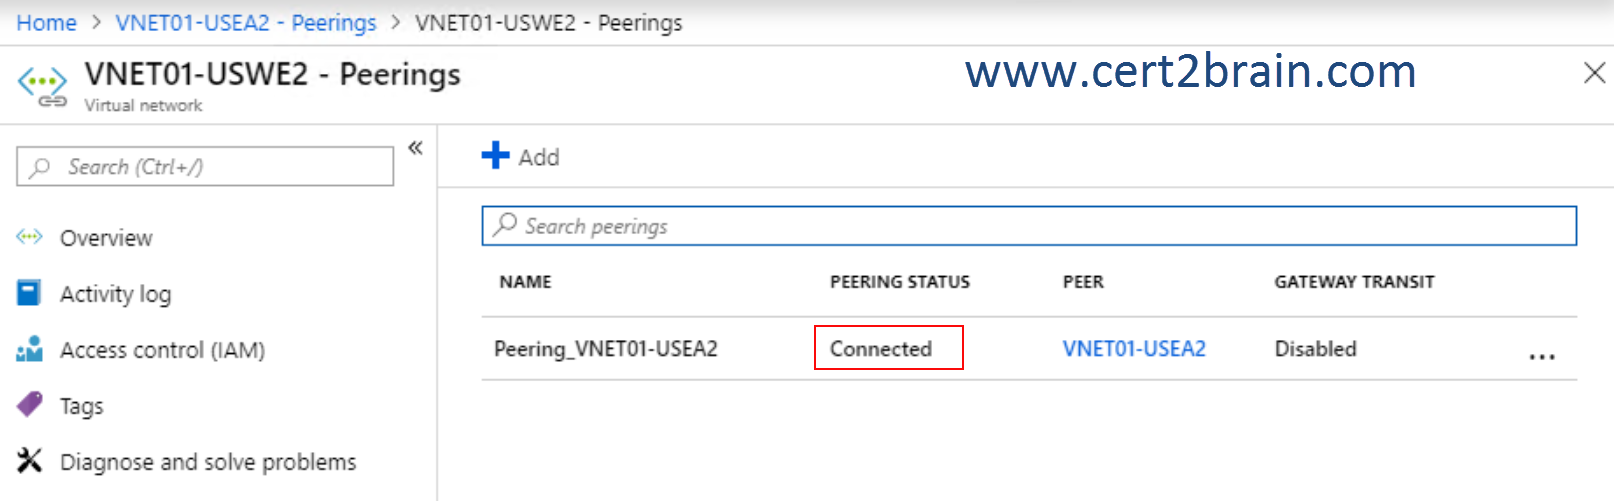
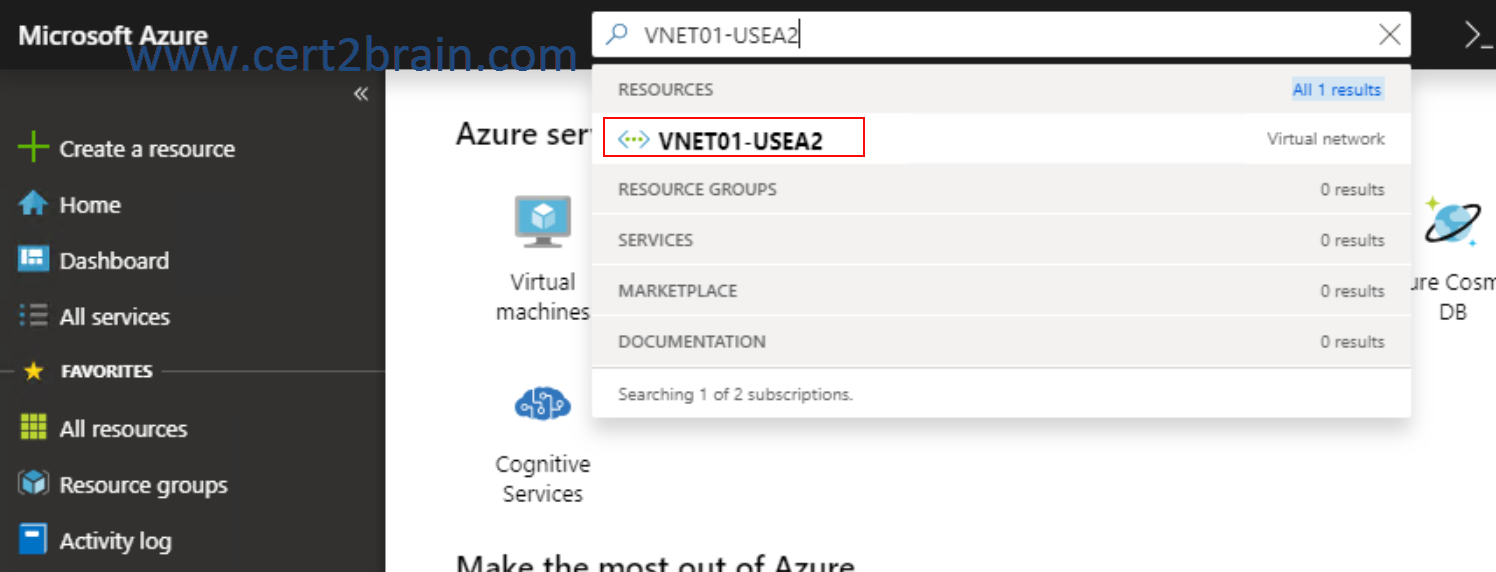
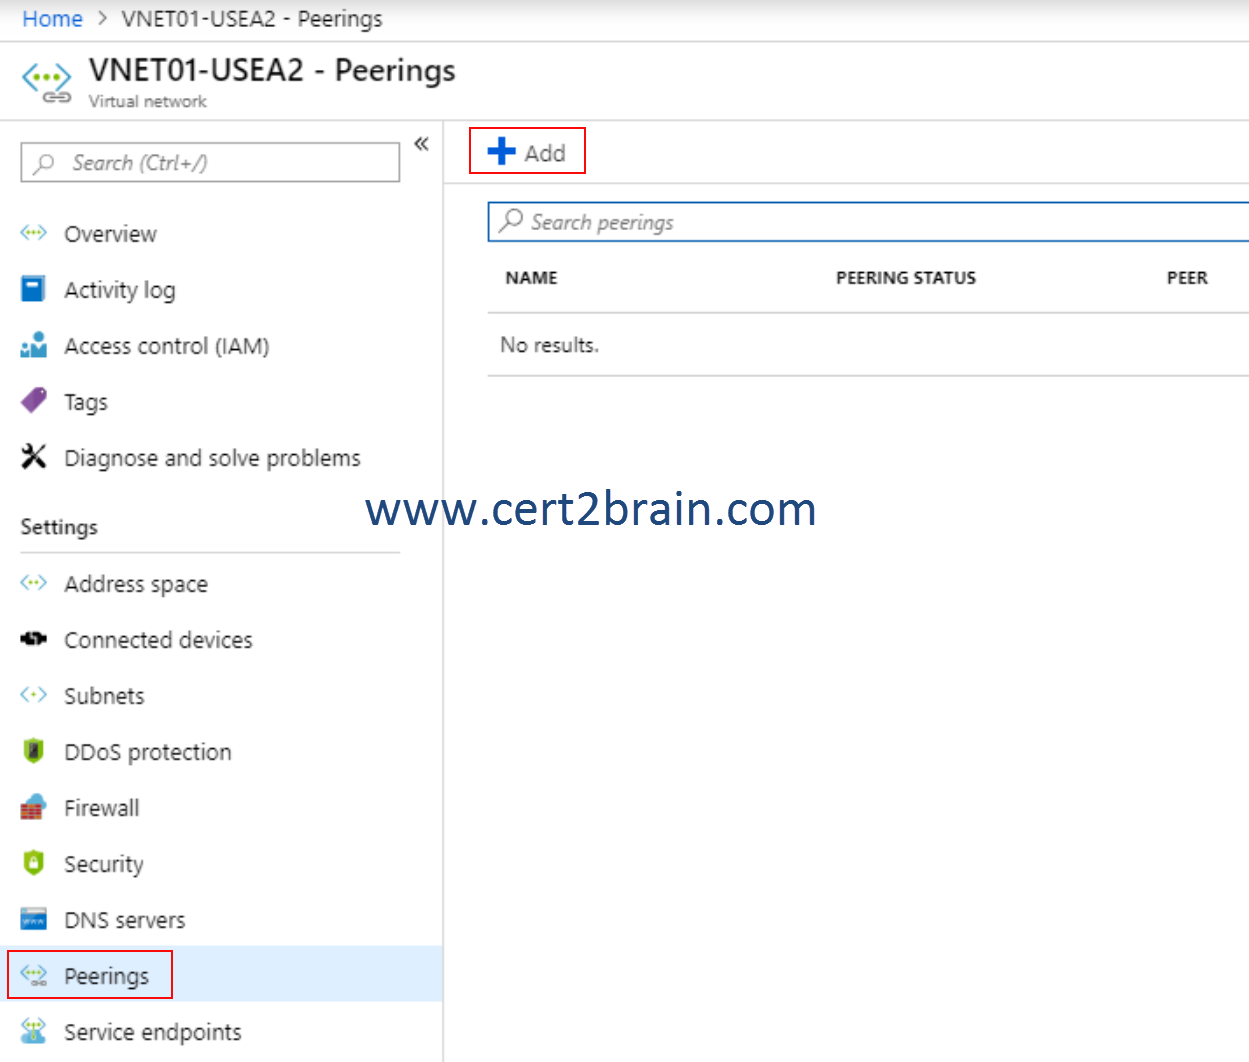
You plan to allow connections between the VNET01-USEA2 and VNET01-USWE2 virtual networks.
You need to ensure that virtual machines can communicate across both virtual networks by using their private IP address. The solution must NOT require any virtual network gateways.
What should you do from the Azure portal?
(This question has to be solved in a lab environment. Click on Solution to see a valid example solution. Answer "True" if you can solve the problem, otherwise select "False".)Correct answer: ASolution:
We need to configure virtuel Network peering. Virtual network peering enables you to seamlessly connect Azure virtual networks. Once peered, the virtual networks appear as one, for connectivity purposes. The traffic between virtual machines in the peered virtual networks is routed through the Microsoft backbone infrastructure, much like traffic is routed between virtual machines in the same virtual network, through private IP addresses only
Step 01: Connect to Azure portal. Type https://portal.azure.com in the browser address bar and use the provided credentials for Sign in.
Step 02: Enter "VNET01-USEA2" in the Azure Portal search bar and open the found virtual network.
Step 03: From the Peerings page, click on +Add.
Step 04: Enter a name for the peering, choose the virtual network to peer with and click on OK.
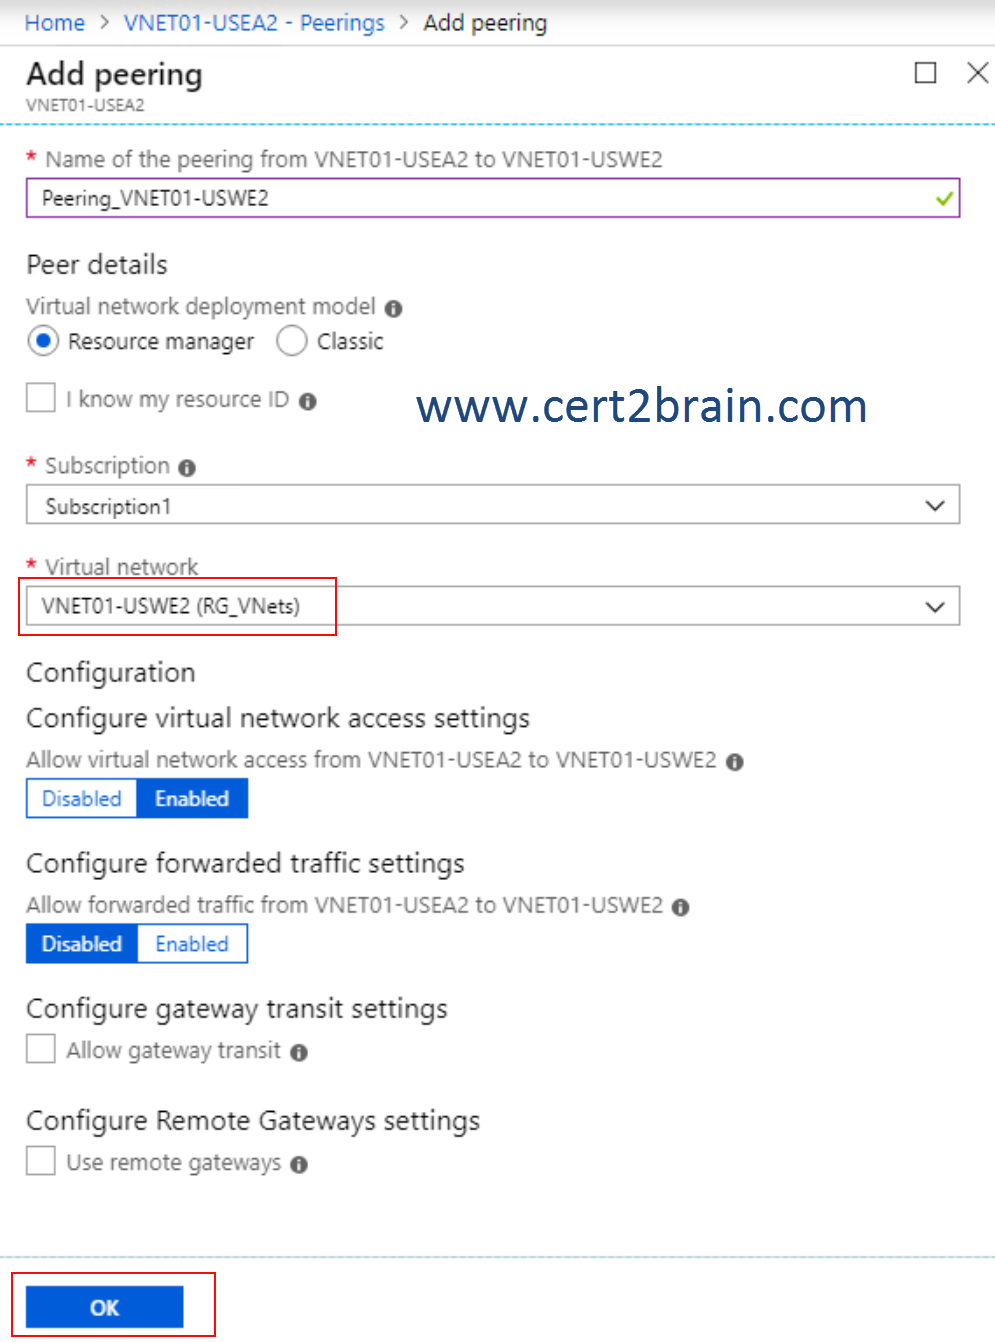

Step 05: To complete the initiated peering, open the VNET01-USWE2 blade, open the Peerings page and click on +Add. Configure the required settings and click on OK